Saturday, January 26, 2013

On the Beach


This tutorial was written for those who have a working knowledge of psp.
I use paint shop 9, but any version should work.


All of my tutorials are of my own creations any similarity with any other tutorial is purely coincidental.Please do not copy my tutorials please link back to my blog!
I am always interested in seeing what you create using my tuts. You can send your results to me at lynnkitten101@gmail.com.

SUPPLIES NEEDED:
Close up of choice.
I am using artwork by Jose Cano
A PTU Artist. You must purchase and obtain a license to use.
You may find Jose Cano's tubes at SATC.
You can get this tube here.

Scrapkit of Choice:
Scrapkit PTU Abby Love by Bibi's Collection.
Which you can find at SATC
You can find this kit here.
 
Mask of Choice:
I used WSL_255 which you can get here

Font of choice.
I used Bonafetti

Filters needed:
eye candy4-gradient glow-not required used for name

Don't forget to save often.

LET'S GET STARTED

Open a new image 700x700

C/P e35 using your magic wand click inside of the frame. Selecions-modify-expand by 5. C/P paper1, selections-invert. Hit delete. C/P e54 place almost in the middle of the frame, hit delete. C/P e50 place at the bottom of the water, so that it looks like a beach, duplicate, move over to cover the whole frame, hit delete for both layers, duplicate 2 more times to fill in the rest of the bottom part of the frame, arrange under the top 2 and erase anything overlapping. Select none and make sure the frame in on top of all layers.


C/P elements of choice or use mine below. See my tag for exact placement.


e85 resize 45% place on the right side of the frame at the bottom
 
e67 resize 60% place on the left side at the bottom, outside of the frame, only part of it on the frame

c/p your tube place on the towel
e71 resize 75% place at the bottom, arrange under the frame layer in the layers palette, duplicate, mirror

e65 resize 25% place at the bottom on the left side up by your tubes right hand, arrange under your tube layer in the layers palette
click on top layer
 
  e55 resize 60% sharpen place at the bottom towards the end of the towel

e53 resize 55% place at the bottom on the right side

e58 resize 35% sharpen place at the bottom by one of the legs of the chair, duplicate and move to the other leg of the chair  

e34 resize 25% place at the bottom in between the 2 weeds
e2 resize 45% place at the top on the right corner of the frame, duplicate, mirror

Crop merged opaque 
 
Merge visible. 
C/P paper 5 apply mask, merge group, send to bottom
Merge visible
 
Add name or saying of choice
 
Add proper copyright info and save as .png
 
Thanks for trying my tutorial. I hope you enjoyed it.
This tutorial was written on January 26, 2013

Sexy Abby


This tutorial was written for those who have a working knowledge of psp.


I use paint shop 9, but any version should work.


All of my tutorials are of my own creations any similarity with any other tutorial is purely coincidental.Please do not copy my tutorials please link back to my blog!
I am always interested in seeing what you create using my tuts. You can send your results to me at lynnkitten101@gmail.com.

SUPPLIES NEEDED:
Close up of choice.
I am using artwork by Jose Cano
A PTU Artist. You must purchase and obtain a license to use.
You may find Jose Cano's tubes at SATC.
You can get this tube here.

Scrapkit of Choice:
Scrapkit PTU Seductive Abby by Lizquis Scraps.
Which you can find at SATC
You can find this kit here.


Font of choice.
I used Clipper Scripts Fat

Filters needed:
eye candy4-gradient glow-not required used for name

Don't forget to save often.

LET'S GET STARTED

Open a new image 700x700

C/P frame3, resize 85%, using your magic wand click inside of the frame. Selecions-modify-expand by 5. C/P paper4, selections-invert. Hit delete. C/P tube, hit delete. Select none. Arrange paper and tube under the frame layer in the layers palette. I used xero-porcelin default settings.

C/P elements of choice or use mine below. See my tag for exact placement.


bubbles mirror place on your tube
 
bug resize 55% rotate right 30 degrees place at the top on the left side, duplicate resize 90% rotate left 15 degrees

c/p your tube place on the right side
cushion place at the bottom under the front of your tube, duplicate move back so that she is completely sitting on the pillow arrange the second one under the first one and erase the part of the pillow that isn't even with the other one, merge the 2 pillows together

stop light resize 75% place on the right side, arrange under the pillow layer in the layers palette
 
  mailbox place on the right side in front of the stop light

cat resize 55% mirror place near the tubes back end on the pillow

  glass resize 65% place at the bottom on the left side

candle resize 55% place at the bottom on the left side, to the right of the glass, arrange under the glass layer in the layers palette

chocolate1 resize 45% place at the bottom on the left side, in front of the glass

cupcake1 resize 40% place at the bottom on the left side to the right of the chocolate

chocolate2 resize 45% place at the bottom on the left side to the left of the cupcake


Crop merged opaque 
 
Merge visible.
 
Add name or saying of choice
 
Add proper copyright info and save as .png
 
Thanks for trying my tutorial. I hope you enjoyed it.
This tutorial was written on January 26, 2013

Friday, January 25, 2013

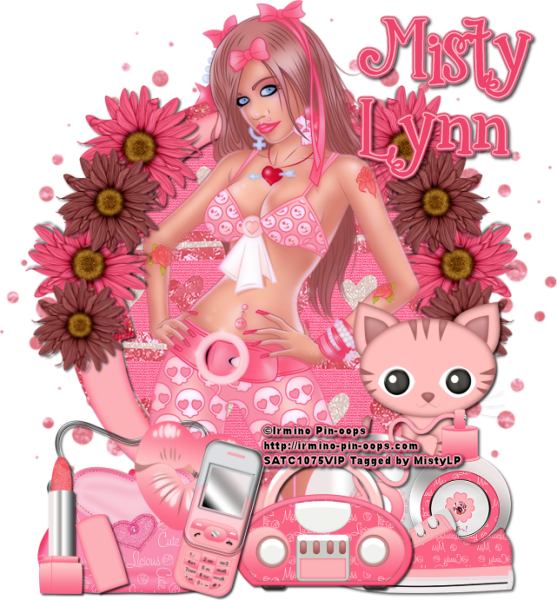
Candy

 
This tutorial was written for those who have a working knowledge of psp.

I use paint shop 9, but any version should work.

All of my tutorials are of my own creations any similarity with any other tutorial is purely coincidental.Please do not copy my tutorials please link back to my blog!
I am always interested in seeing what you create using my tuts. You can send your results to me at lynnkitten101@gmail.com.

SUPPLIES NEEDED:
Close up of choice.
I am using artwork by Irmino Pin-Oops
A PTU Artist. You must purchase and obtain a license to use.
You may find Irmino's tubes at SATC.
You can get this tube here.

Scrapkit of Choice:
Scrapkit PTU Miss Candy by SkyScraps Designs.
Which you can find at SATC
You can find this kit here.


Font of choice.
I used 2Peas Mister Giggles

Filters needed:
eye candy4-gradient glow-not required used for name

Don't forget to save often.
 
 
LET'S GET STARTED

Open a new image 700x700

C/P e23 resize 65%, place in center, using your magic wand click inside of the frame, selections-modify-expand by 5. C/P paper5, selections-invert-hit delete.
 
 C/P tube, center with frame.

C/P elements of choice or use mine below. See my tag for exact placement.


e50 resize 38%,place at the top on the left side, duplicate, mirror, duplicate resize 90%, move down
 

e51 resize 32%, place at the top on the left side down a bit from the first flower, duplicate, mirror, duplicate move down a bit from the second pink flower, duplicate, mirror
 
e4 resize 45% place at the bottom on the left side

e14 resize 30%, place at the bottom on the left side of the purse
 
  e54 resize 30%, rotate left 15 degrees,  place at the bottom on the left side, on the right side of the purse

e12 resize 35%, rotate left 15 degrees,  place at the bottom to the right of the lips

  e18 resize 45% place at the bottom to the right of the cell phone, arrange under the cell phone layer in the layers palette

e15 resize 45%, mirror, place at the bottom to the right of the radio, arrange under the radio layer in the layers palette

e8 resize 45% place at the bottom on the right side, behind the shoe, arrange under the shoe layer in the layers palette

e20 resize 45% place at the bottom on the right side, behind the radio, arrange under the perfume layer in the layers palette

e39 resize 45%, place at the bottom on the right side, behind the cd and perfume, arrange under them in the layers palette 
 
e45 resize 90% center send to bottom

Crop merged opaque 
 
Merge visible.
 
Add name or saying of choice
 
Add proper copyright info and save as .png
 
Thanks for trying my tutorial. I hope you enjoyed it.
This tutorial was written on January 25, 2013


Tuesday, January 22, 2013

Jinx with Attitude


This tutorial was written for those who have a working knowledge of psp.

I use paint shop 9, but any version should work.

All of my tutorials are of my own creations any similarity with any other tutorial is purely coincidental.Please do not copy my tutorials please link back to my blog!
I am always interested in seeing what you create using my tuts. You can send your results to me at lynnkitten101@gmail.com.

SUPPLIES NEEDED:
Close up of choice.
I am using artwork by Jose Cano
A PTU Artist. You must purchase and obtain a license to use.
You may find Jose Cano's tubes at SATC.
You can get this tube here.

Scrapkit of Choice:
Scrapkit PTU Naughty Jinx by MistyLynn's Creations.
Which you can find at SATC.
You can purchase this kit here.


Font of choice.
I used University Roman LET.

Filters needed:
eye candy4-gradient glow

Don't forget to save often.

LET'S GET STARTED

Open a new image 700x700
 
c/p glitter01 resize 90%, center, c/p glitter02 resize 90%, center

C/P frame03, using your magic wand click inside of the frame. Selecions-modify-expand by 5. C/P paper4, selections-invert. Hit delete. C/P tube, duplicate, close duplicate, click on original, hit delete. Select none. Arrange paper and tube under the frame layer in the layers palette. Click on duplicate, open, bring to top, erase the bottom part of her legs.

C/P elements of choice or use mine below. See my tag for exact placement.


ball01 resize 55% place at the top on the left side, arrange under the paper layer in the layers palette
 
click on top layer

lips03 resize 40%, place at the top on the left side over the ball
 
chain01 resize 55% place at the top on the left side, arrange under the lips layer in the layers palette, so it looks like it is hanging from them

sucker01 resize 35%, place towards the bottom on the left side, see mine for exact placement
 
  sucker02 resize 35%, place at the bottom on the left side down and to the right from the first sucker

Jinx Mix resize 55% place at the bottom on the left side

  drink01 resize 35% place at the bottom on the left side to the right of jinx mix

bottle resize 35% place at the bottom on the left side to the right of the drink

skull butterfly resize 45%, rotate left 15 degrees, place at the top on the right side
 
skull chain02 place on the right side, arrange under the skull butterfly layer in the layers palette, place the star under the butterfly so that it looks like it is hanging from it

nighty resize 45%, place at the bottom on the right side

cupcake02 resize 35% place at the bottom on the right side, to the left of the nighty

shoe01 resize 40% place at the bottom on the right side, to the left of the cupcake, duplicate and move the second one over and down a bit

finger resize 40% place at the bottom, to the left of the second shoe, arrange under the shoe layer in the layers palette

wordart resize 75%, add a black gradient glow, arrange it at the bottom, erase just the edge of it so it looks like it is under the bottle

sparkles03 place at the bottom

Crop merged opaque 
 
Merge visible
 
Add name or saying of choice
 
Add proper copyright info and save as .png
 
Thanks for trying my tutorial. I hope you enjoyed it.
This tutorial was written on January 22, 2013