Wednesday, November 27, 2013

Blue Christmas


This tutorial was written for those who have a working knowledge of psp.
I use paint shop 9, but any version should work.
All of my tutorials are of my own creations any similarity with any other tutorial is purely coincidental.Please do not copy my tutorials please link back to my blog!

I am always interested in seeing what you create using my tuts. You can send your results to me at lynnkitten101@gmail.com


SUPPLIES NEEDED:

Tube and close up of choice.
I am using artwork by Wendy Gerber
A PTU Artist. You must purchase and obtain a license to use
 You can get this tube here.


Scrapkit of Choice:
Scrapkit PTU Blue Christmas by MistyLynns Creations
  you can find this kit here


Font of choice.
I used Connie
 
Mask of Choice:
I used WSL_81 which you can get here


Filters needed:
eye candy4-gradient glow-used for name


Don't forget to save often!


LET'S GET STARTED

Open a new image 800x800
 
C/P Paper10 apply mask, merge group. Center 


C/P Element21, resize85%, center using your magic wand click inside of the frame. Selecions-modify-expand by 5. C/P paper6, selections, invert, hit delete. C/P close up of tube, hit delete. Select none. Arrange tube under the frame layer in the layers palette.

C/P tube place on the right side


C/P elements of choice or use mine below. See my tag for exact placement.


element33
element38
element30
element31
element48
element34 mirror
element09
element19
element14
element20
 
Merge visible
Add name or saying of choice
Add proper copyright info and save as .png
Thanks for trying my tutorial. I hope you enjoyed it.
This tutorial was written on November 27, 2013

 
post signature

Stick and Move


This tutorial was written for those who have a working knowledge of psp.
I use paint shop 9, but any version should work.


All of my tutorials are of my own creations any similarity with any other tutorial is purely coincidental.Please do not copy my tutorials please link back to my blog!


I am always interested in seeing what you create using my tuts. You can send your results to me at lynnkitten101@gmail.com


SUPPLIES NEEDED:


Tube of choice.
I am using artwork by Keith Selle
A PTU Artist. You must purchase and obtain a license to use.
 You can get this tube here.
 
Scrapkit of Choice:
Scrapkit PTU Punk Girl by Kandii Popz Dezignz.
  which you can get  here
Font of choice.  
I used  Foglighten No7
which you can get here


Mask of Choice:
I used WSL_180 which you can get here


Filters needed:
eye candy4-gradient glow-used for name


Don't forget to save often!


LET'S GET STARTED


Open a new image 700x700
 
  c/p frame2 resize85%  using your magic wand click inside the frame
selection-modify by 5 c/p paper13, selections-invert hit delete
c/p tube duplicate, close duplicate, click on original hit delete
select none, move tube paper under frame
click on duplicate bring to top and erase anything outside the
bottom of the frame


c/p the following elements
 
phone resize65% place at the bottom on the right side 
 
shoes resize65% place to the left of the phone

lippy resize65% place in front of the shoes 

cuppy resize55%  place to the left of the lippy

heart pop resize75%  place to the left of the cuppy arrange under the cuppy in the layers palette

lips resize75% place to the left of the heart pop arrange under the heart pop in the layers palette

stars  place to the left of the lips arrange under the lips in he layers palette
 
ribbon2  place on the left side arrange under all other elements in the layers palette

cherries resize65% place on the right side towards the top of the frame

splats  place at the top send to bottom, duplicate, flip
 

c/p paper4 send to bottom, apply mask, merge group, move up some, duplicate, flip and move down some

Merge visible

Add name or saying of choice

Add proper copyright info and save as .png

Thanks for trying my tutorial. I hope you enjoyed it.

This tutorial was written on November 27, 2013
post signature

Wednesday, November 13, 2013

CandlesNJubi Christmas


This tutorial was written for those who have a working knowledge of psp.
I use paint shop 9, but any version should work.


All of my tutorials are of my own creations any similarity with any other tutorial is purely coincidental.Please do not copy my tutorials please link back to my blog!


I am always interested in seeing what you create using my tuts. You can send your results to me at lynnkitten101@gmail.com


SUPPLIES NEEDED:


Tube of choice.

I am using artwork by Derzi
A PTU Artist. You must purchase and obtain a license to use.
 You can get this tube here.
 
Scrapkit of Choice:

Scrapkit PTU Christmas In Wonderland by PinkParadoxProductions.
  which you can get  here


Font of choice. I used  which you can get here


Mask of Choice:
I used WSL_84 which you can get here


Filters needed:

eye candy4-gradient glow-used for name


Don't forget to save often!


LET'S GET STARTED


Open a new image 700x700
 
  c/p frame6 resize55% twice, using your magic wand click inside the frame
selection-modify by 5 c/p paper14 resize55%, selections-invert hit delete
c/p tube duplicate, close duplicate, click on original hit delete
select none, move tube paper under frame
click on duplicate bring to top and erase anything outside the
bottom of the frame


c/p the following elements
 
e18 resize45% place at the bottom on the left side 
 
e22 resize45% place to the right of the glass

e63 resize25% place to the right of the sucker 

e6 resize55% then resize35%  place in front of the sucker

e8 resize25%, mirror,  place in front of the glass and down a bit

e24 resize25%, mirror, place to the right of the cookie

e23 resize25%, rotate right 35 degrees, place to the right of the red candy cane, place together to form a heart
 
e37 resize65% place to the right of the green candy cane, arrange under the layer in the layers palette

e42 resize25% place to the right of the present, arrange under the layer in the layers palette

e37 resize55% place to the right of the bag
 
e83 resize65% place behind the presents/gift bag in the layers palette

c/p paper22 send to bottom, apply mask, merge group

Merge visible

Add name or saying of choice

Add proper copyright info and save as .png

Thanks for trying my tutorial. I hope you enjoyed it.

This tutorial was written on November 13, 2013


 photo ScribblesSignture_zps340c60d1.png

Tuesday, November 12, 2013

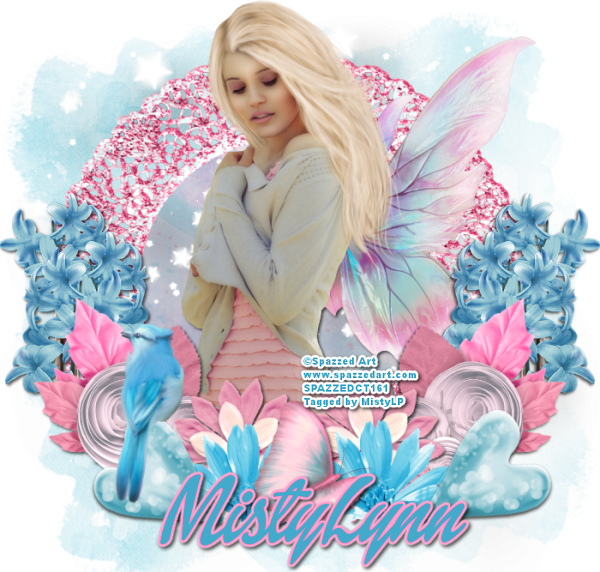
Fairy Kisses


This tutorial was written for those who have a working knowledge of psp.

I use paint shop 9, but any version should work.


All of my tutorials are of my own creations any similarity with any other tutorial is purely coincidental.Please do not copy my tutorials please link back to my blog!


I am always interested in seeing what you create using my tuts. You can send your results to me at lynnkitten101@gmail.com


SUPPLIES NEEDED:


Tube of choice.

I am using artwork by Spazzd Art

A PTU Artist. You must purchase and obtain a license to use.
 You can get this tube here.
 

Scrapkit of Choice:

Scrapkit PTU Fairy Kisses by KissingKate.

  which you can get  here


Font of choice. 


Mask of Choice:
I used WSL_254 which you can get here


Filters needed:


eye candy4-gradient glow-used for name


Don't forget to save often!


LET'S GET STARTED


Open a new image 700x700

  c/p frame1 resize85%  using your magic wand click inside the frame
selection-modify by 5 c/p paper6 resize75%, selections-invert hit delete
c/p tube duplicate, close duplicate, click on original hit delete
select none, move tube paper under frame
click on duplicate bring to top and erase anything outside the
bottom of the frame


c/p the following elements
e47 resize45% place towards the bottom on the left side, duplicate 2x, move to the right of  the other, mirror the other and move it below the first. merge the 3 together, duplicate, mirror

e43 resize45% place on the left side with the blue flowers, duplicate, mirror


e31 resize35% place to the right of the pink flower on the left, duplicate, mirror


e45 resize35%  place below the pink flower(e31), duplicate, mirror


e3 resize35% place in the center of the flowers


e83 resize55%, rotate right 55 degrees place on the right side to the right of the blue flower(e45), duplicate, mirror


e31 resize35% place on the left side on top of the heart
 
e81 place behind your frame layer, duplicate
 

c/p paper12 send to bottom, apply mask, merge group


Merge visible


Add name or saying of choice


Add proper copyright info and save as .png


Thanks for trying my tutorial. I hope you enjoyed it.


This tutorial was written on November 12, 2013


 photo ScribblesSignture_zps340c60d1.png

Monday, November 11, 2013

Christmas Wonderland

 
This tutorial was written for those who have a working knowledge of psp.
I use paint shop 9, but any version should work.


All of my tutorials are of my own creations any similarity with any other tutorial is purely coincidental.Please do not copy my tutorials please link back to my blog!


I am always interested in seeing what you create using my tuts. You can send your results to me at lynnkitten101@gmail.com


SUPPLIES NEEDED:


Tube of choice.

I am using artwork by Ninaste
A PTU Artist. You must purchase and obtain a license to use.
 You can get this tube here.
 
Scrapkit of Choice:

Scrapkit PTU Christmas In Wonderland by PinkParadoxProductions.
  which you can get  here


Font of choice. I used  which you can get here


Mask of Choice:
I used WSL_254 which you can get here


Filters needed:

eye candy4-gradient glow-used for name


Don't forget to save often!


LET'S GET STARTED


Open a new image 700x700
 
  c/p frame6 resize55% twice, using your magic wand click inside the frame
selection-modify by 5 c/p paper21 resize55%, selections-invert hit delete
c/p tube duplicate, close duplicate, click on original hit delete
select none, move tube paper under frame
click on duplicate bring to top and erase anything outside the
bottom of the frame


c/p the following elements
 
e28 resize55% place at the bottom on the left side 
 
e37 resize75% place at the bottom of your tree

e18 resize45% place on the right side at the bottom 

e20 resize35%  place to the left of the drink

e27 resize35% place to the right of the red present

e42 resize35% place behind the red present and to the left a bit

e48 resize40% place on the right side of the frame at the top
 
e5 resize35% place behind the red present

e7 resize55% place behind the drink and to the right a bit

e8 resize30%, mirror, place to the left of the cupcake

e1 resize45% place in front of the teacup and red present 

c/p paper16 send to bottom, apply mask, merge group

Merge visible

Add name or saying of choice

Add proper copyright info and save as .png

Thanks for trying my tutorial. I hope you enjoyed it.

This tutorial was written on November 11, 2013


 photo ScribblesSignture_zps340c60d1.png